
Firefighters at Parker Fire College are presented with vehicle extrication training ideas. They undergo a series of vehicle extrication techniques including dash roll extrication, rescue extrication and ‘B’ post blowout.
VIDEO TRANSCRIPTION:
SAFE THE CAR
When we show up on scene, we want to ‘safe the car’. What that means is to try to put it in park or put the emergency brake on.
On the newer cars, all of this stuff is powered, so if it’s still on and it’s not a hindrance, roll the windows down, move the seats back, move the steering wheel up or any of that stuff that can help you.
All of this new stuff, it’s going to be laminate. It’s not like it’s a huge deal, but that stuff is really bad to breathe. That is going to cause cancer. We try to get away from cutting the windshields and stuff.
THE PATIENTS
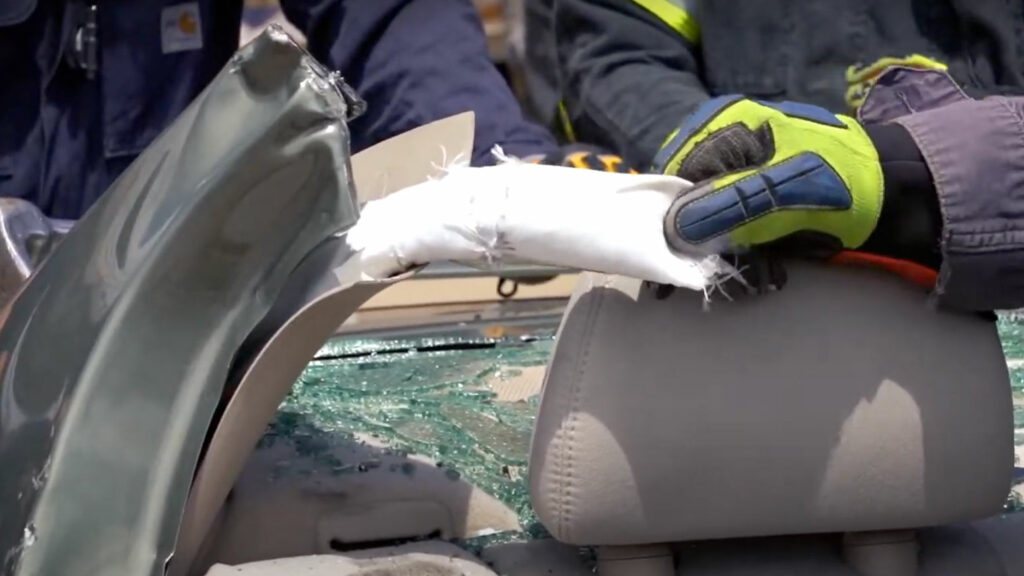
If you do have to do that, protect your airway and the patient’s. There are some techniques for that. If you’ve got blankets or tarps, you can put them on the patient. But the other thing you could do is, you’ve got a patient here, you break these windows, you can grab floor mats from the inside, break it and push it out.
I like to at least get somebody in there and talk to the patient. Words like, Hey, how are you? What’s hurt? What’s stuck? Try to calm them down a little bit and then tell them what it is going to be like. It is going to be really loud. There’s going to be stuff cutting around you. Let me know if anything starts pushing on you.
PEELING AND PEEKING
Make sure you are always peeling and peeking. We teach that you don’t have to do it on both sides. If you’re going to cut on this side and you’ve got room on the other side, somebody else can be over there doing the same thing. Make sure it is mirrored on either side.
B-POST BLOWOUT
Well, let’s just say we’ve got a patient in the front there and they are pinned. Let’s say they got some intrusion here. The spreaders are going to come back and after you break this glass you can either open it up or you can pinch it. All you’re trying to do is just get a little purchase point here, and there’s a Nadir pin in there, and that’s all you’re trying to do. We try to teach to spread enough to where you can get the cutter in without popping it, but a lot of times it will pop. It’s not a problem just as long as you’re aware of it. So as the spreaders doing that, cut here, come up, make a cut here.
I like to go either above it or right below. A lot of the strength is right in here. Sometimes if you can get up here, then you can kind of get your purchase point and start spreading. As this goes, you can get your spreaders in here and use this post down low.
With this cut up high here, now this whole thing is going to swing open. It will be open to people and be out of the way. You can come up and cut your hinges and take the whole thing off. If they’re still working there, come over here and get ready for the dash roll.
Your shotgun rail here is if you cut up high here before the leaf Springs, you don’t lose a lot of that integrity.
You just want to make a cut somewhere in here and just go right through the hood. It doesn’t matter. Take your cutter and you’re just making a cut there. I like to cut above this if I can. sometimes take the wiring harness, I will use anything the car is going to give me, like this opening right here.
Put your cutters right in there. We’re not lifting the dash 18 inches like the textbook training. A lot of times people’s feet are pinned underneath the dash, we’re just trying to get the dash to where it used to be.
We’re not lifting the dash 18 inches like the textbook training. A lot of times people’s feet are pinned underneath the dash, we’re just trying to get the dash to where it used to be.
INSTRUCTOR TIPS
Look at this dash, how this side is still staying intact. There’s a bar that goes across here that we’ll be able to see here. It’s the support for the dash. There’s usually two (bar ties). If the dash isn’t lifting evenly, you’ll have to cut them.
B-POST PUSHDOWN RAPID EXTRICATION
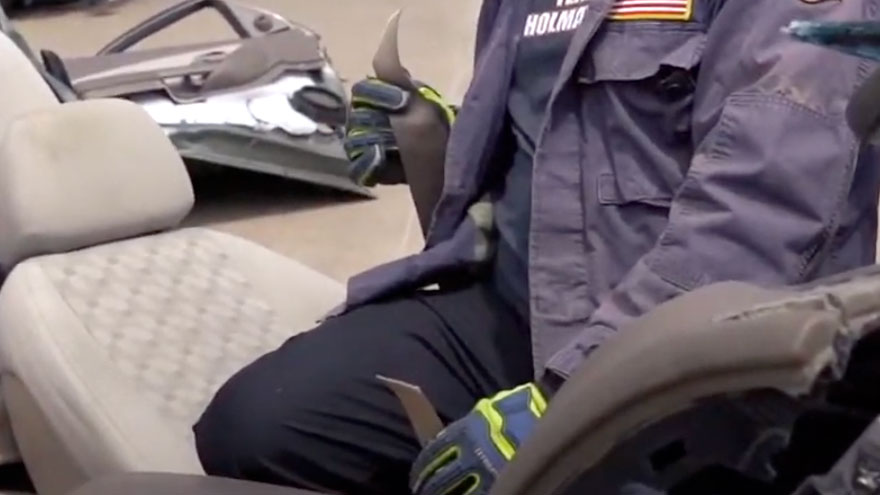
The ‘B post push down’ is more of a rapid way we can get this person out. All you have to do is pop this door, make a cut here, and make a cut here. Throw your spreaders on top and start spreading it down. You get a ramp in there, so it pushes this whole thing down. That keeps it out of the way.
POP THE TOP
It dropped down to the patient’s department, right? There’s a patient sitting there and you’re cutting, you need to pay attention to that. I have dudes on the outside so as weight is getting put on that roof and it wants to sit down, we can move it.
Your patients’ feet are pinned up underneath the dash. The pedals are going to be in the way. Pedals are strong front to back. They have no lateral stability. You can just fish in there and hook the webbing around the pedals.
INSTRUCTOR TIPS
FOOT PEDALS
Let’s use a simple piece of webbing. You get to this point and your patients’ feet are pinned up underneath the dash. The pedals are going to be in the way. Pedals are strong front to back. They have no lateral stability. You can just fish in there and hook the webbing around the pedals.
AIR BAGS

You guys can see we’re getting it. About an inch out of the way, which may be all you need. You guys can see, they found an airbag what’s that tell us? Cylinders. If we have an airbag, there has to be a cylinder somewhere in the back here.
Nine times out of 10, when you feel one side of the car, the exact same thing is on the other side. This is that ACU. They’re generally going to look like this one. I’m not sure why it’s not yellow, but that’s what they’re going to look like. Somewhere in here, you will find it.
A lot of times they’re actually further up in here. When we talk about that ‘blind center console dash lift’, put your spreaders in here. We don’t want to come in contact with that. So those are going to be somewhere in here. So that’s why it is important to pull that plastic out and find a good pocket to push it down.
SEATBELTS
You want to do diagonal cuts on your seatbelts. If you don’t cut seatbelts when you’re doing the blowout or the laydown, they will hang you up every time.
INSTRUCTOR TIPS
Here’s your seatbelt retention. This is a pyrotechnic that will lock your seatbelt down. So that’s your little pyrotechnic guy right there. That’s what we’ll deploy to lock the seatbelt down. These guys jumped on it really quick, but always remember to cut seatbelts. When you cut seatbelts, you want to cut them at an angle.
You take your seatbelt cutter and try to go straight across, it will bunch up in there. You want to do diagonal cuts on your seatbelts. Cut them. If you don’t cut seatbelts when you’re doing the blowout or the laydown, they will hang you up every time.